Written by Min, Senior Engineer with 10 years of experience in packaging automation.
Most people focus on speed, automation level, or price when shopping for a carton sealer, but in practice, the first thing you should look at is your carton size. I’ve seen factories buy the right machine on paper, only to discover on day one that their boxes were too tall by a few centimeters or so light that the drive belts couldn’t grip them properly. Those mistakes aren’t dramatic—they’re just quietly expensive. So in this guide, I want to walk you through how to measure cartons the right way, based on real cases I’ve seen on warehouse floors.
If you’re still comparing models and trying to understand automation choices, you may want to check the bigger picture here: How to Choose the Right Carton Sealer.
For context on how machines differ, especially when sizing matters: Automatic vs Semi-Automatic Carton Sealer.
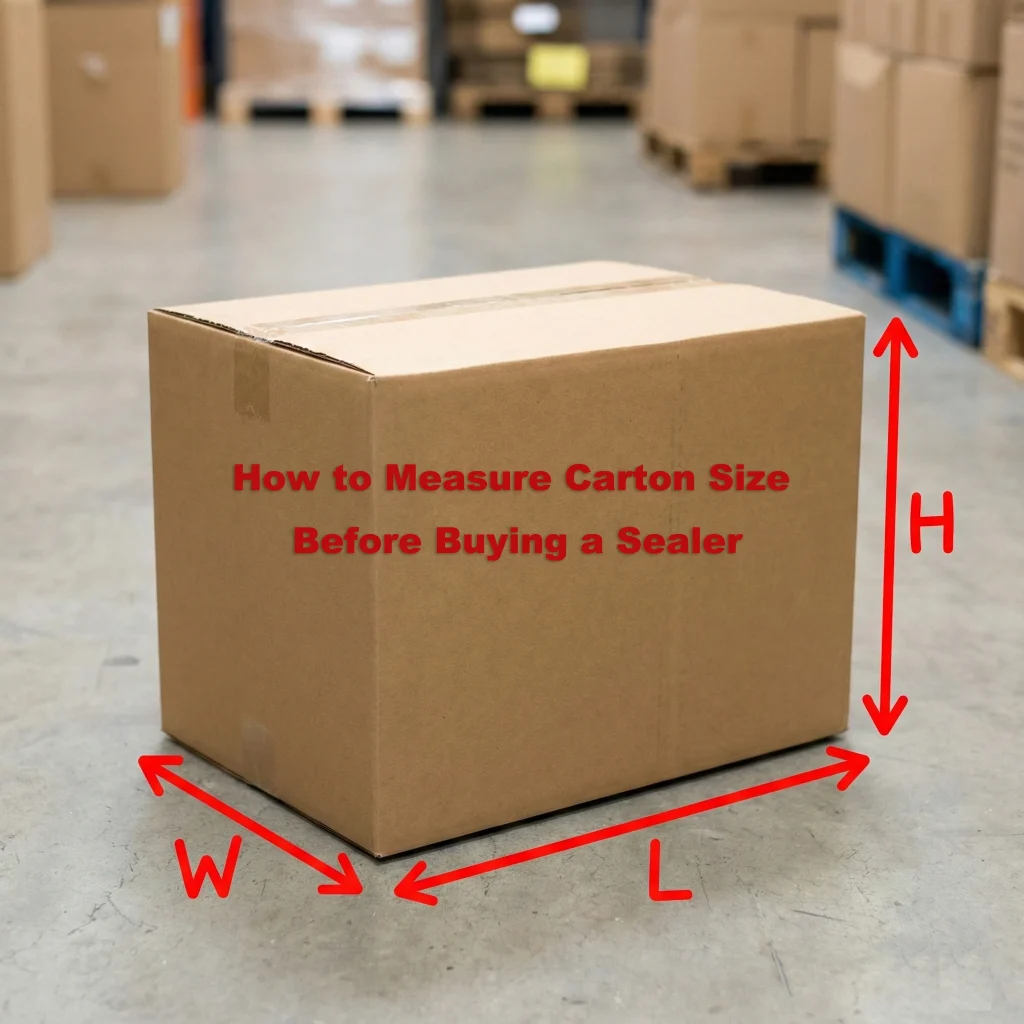
L/W/H Measurement
Let’s start with the basics, but do it in a way that actually reflects how sealing machines handle boxes. When manufacturers talk about carton dimensions, they don’t use the same logic as printing plants or fulfillment teams. Sealing machines care about how a box travels through the machine, not how it sits on a pallet.
Length(Machine Direction)
Length is the direction the carton travels. This dimension determines how long the drive belts and sealing zone are exposed to the box. Expert Tip: Don’t just measure the box; measure the gap between boxes too. Also, check the machine’s minimum length spec. If your box is shorter than the distance between the front and rear rollers, it will get stranded in the middle of the machine—a nightmare for operators.
Width
Width is the distance between the side belts or guide rails. This measurement decides whether the machine can square the box before taping. If the width is outside the machine’s adjustment range, you’ll see drifting, tilting, and occasional jams.
Height
Height decides how the upper tape head presses down on the flaps. If your cartons vary in height often, make sure the machine’s adjustment system is friendly. Operators usually adjust the height more than any other dimension, so usability matters.
If you need a clearer understanding of how box structure plays a role in tape performance, take a look at the industries using sealers: Industries That Use Carton Sealers.
For standardized definitions of carton dimensions in packaging engineering, the resource here is quite helpful: ASTM Carton Size Standard.
Tape Width Matching
Most buyers underestimate tape width until the moment they run their first batch on a new machine. Tape width determines stability, adhesion strength, and sealing reliability. If your tape is too narrow for your carton height, you’ll see the edges lift—what operators usually call “flagging.”
Common widths include:
- 48 mm tape — standard for most boxes
- 60 mm tape — for heavy cartons or recycled board
- 72 mm tape — for very tall or high-value boxes
Here’s a simple rule based on my experience walking through factories: The taller the carton, the more tape width matters.
And if you’re unsure what width your machine supports, check the specific product page because manufacturers often design tape heads around one or two compatible sizes. You can find examples on our general category here: Carton Sealer Page.
Testing Steps
Before you commit to a machine, test your carton dimensions in a way that reflects real operating conditions. I’ve done these tests with dozens of factories, and they reduce surprises better than any technical sheet.
1. Test With Your Heaviest Carton
Seal that box first. Heavy cartons reveal belt slippage, weak squaring, or inconsistent feed strength. If the machine handles your worst-case scenario, the rest will be easy.
2. Test With Your Lightest Carton
Light boxes sometimes fail to “bite” the drive belts, especially side-drive models. If your product line includes feather-light cartons, make sure the drive system can handle them without manual assistance.
3. Test With Worn, Recycled, or Slightly Warped Boxes
No warehouse uses perfect boxes every day. Bring the ugliest samples you can find. If the sealer treats them well, you’re on the right track.
4. Test Several Heights Back to Back
This part is crucial if your operator will adjust the machine often. Some machines make height adjustments effortless. Others feel like turning a rusted car jack.
5. Test the Tape Path After Changing Sizes
Each time you adjust box dimensions, the tape path should remain clean and straight. If not, you’ll see wrinkles, uneven sticking, or misalignment.
For a bigger picture on how sealers should be maintained once installed, this guide helps: Carton Sealer Maintenance.
Final Thoughts
Measuring cartons isn’t exciting, but it’s the part of the buying process that prevents costly mistakes. A carton sealer is only as good as the boxes you feed it, and even the best machine can’t make up for inaccurate sizing or misunderstood dimensions.
If you’re comparing models, automation choices, or trying to decide what fits your workflow, you may find this helpful too: How to Choose the Right Carton Sealer.